Remote work isn’t going anywhere, and neither is the need for a dedicated workspace that doesn’t eat up your living room. Built-in home offices offer a permanent, space-efficient solution that outperforms modular furniture in both function and resale value. Whether you’re carving out a corner in the bedroom or claiming an alcove under the stairs, a well-designed built-in turns overlooked square footage into productive real estate. This guide walks through location selection, essential design elements, and whether to DIY or call in help.
Table of Contents
ToggleKey Takeaways
- A built-in home office maximizes space efficiency by utilizing corners, alcoves, and awkward niches that standard furniture cannot address, while adding measurable resale value to your home.
- Proper desk height (29 inches for seated work, 38–42 inches for standing) and at least 24 inches of depth are essential for ergonomic comfort and monitor placement in your workspace.
- Wall attachment to studs using 3-inch cabinet screws or French cleats is non-negotiable for safety, stability, and code compliance when installing cabinets and floating desktops.
- Strategic lighting—combining natural light positioned perpendicular to windows with adjustable task lighting (3000K–5000K LED)—reduces eye strain and improves productivity in a built-in office setup.
- Budget-friendly alternatives like stock cabinets from big-box retailers, floating shelves made from dimensional lumber, and reclaimed materials can achieve a custom built-in look for $2,000–$5,000 or less.
- DIY projects suit intermediate woodworkers with basic tools, while structural modifications, HVAC rerouting, and complex electrical work require licensed professionals to ensure code compliance and protect your investment.
Why Choose a Built-In Home Office Over Freestanding Furniture
Built-ins maximize every inch. Freestanding desks and bookcases leave dead space behind them and rarely fit room dimensions perfectly. Custom millwork extends wall-to-wall or floor-to-ceiling, using corners, soffits, and awkward niches that standard furniture can’t address.
Permanent installations add value. Appraisers and buyers recognize built-ins as improvements, not personal property. A professionally executed home workstation with integrated shelving, cable management, and hardwired task lighting signals quality construction and thoughtful design.
They’re structurally stable. Anchoring cabinets and countertops directly to wall studs eliminates wobble and provides load-bearing capacity that standalone desks can’t match. You can safely stack reference books, monitors, and equipment without the sway or sag common in particleboard towers.
Built-ins adapt to changing needs. Modular components, adjustable shelves, removable drawer inserts, and swappable desktop surfaces, allow reconfiguration without replacing the entire system. When laptops shrink or printers vanish, the bones of the workspace remain useful.
Best Locations for Your Built-In Home Office
Spare bedrooms top the list for dedicated workspace. A full room offers control over lighting, acoustics, and door privacy. Standard bedroom closets can be removed and the recess expanded to accommodate a 24-inch-deep countertop with upper cabinets.
Alcoves and nooks under stairs or beside chimneys provide just enough footprint for a compact workstation. Measure the clear width and depth carefully, most adults need at least 30 inches of legroom and 48 inches of desk width for comfortable typing and monitor placement.
Hallways and landings work when width exceeds 5 feet. A shallow built-in (12 to 15 inches deep) with a fold-down work surface or narrow standing desk keeps circulation paths open while claiming vertical wall space for storage.
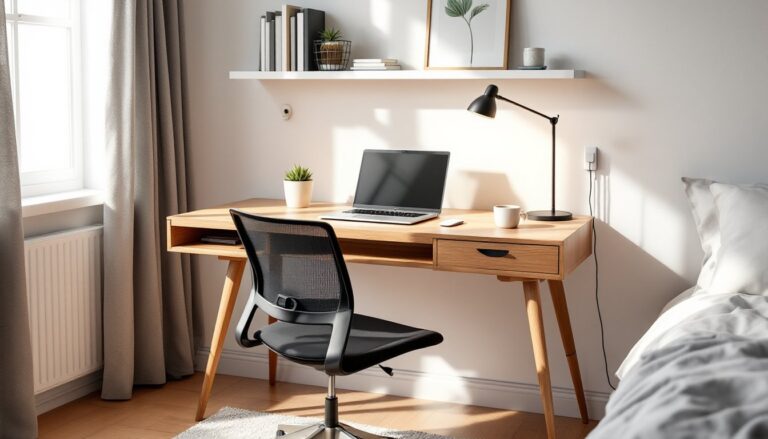
Master bedroom corners suit light-duty tasks, email, bills, online shopping, but struggle with video calls and concentrated work if a partner keeps different hours. Consider efficient home workspace layouts that separate sleep and work zones with room dividers or strategic furniture placement.
Closet conversions gain traction in small homes. Removing bifold doors and installing a desktop at 29 to 30 inches above finished floor (AFF) creates a focused cockpit. Add a tension rod and curtain if you need to hide clutter during video meetings.
Essential Design Elements for a Functional Built-In Workspace
Desktop height and depth dictate comfort. Standard desk height is 29 inches AFF for seated work: standing desks range from 38 to 42 inches depending on user height. Depth should be at least 24 inches to accommodate a monitor at arm’s length, keyboard, and notepad. If the workspace backs onto a wall with plumbing or ductwork, confirm clear depth before cutting.
Countertop materials include 3/4-inch plywood with laminate or veneer (budget-friendly, paintable), hardwood edge-glued panels (warm, durable), and butcher block (forgiving to install, requires sealing). Avoid particleboard: it sags under monitor arms and doesn’t hold screws for cable grommets.
Wall attachment is non-negotiable for safety and code compliance. Locate studs with a stud finder, then fasten cabinets and floating desktops with 3-inch cabinet screws into solid framing. If studs don’t align, add a French cleat (a 45-degree beveled mounting strip) across multiple studs to distribute the load.
Storage Solutions and Organization
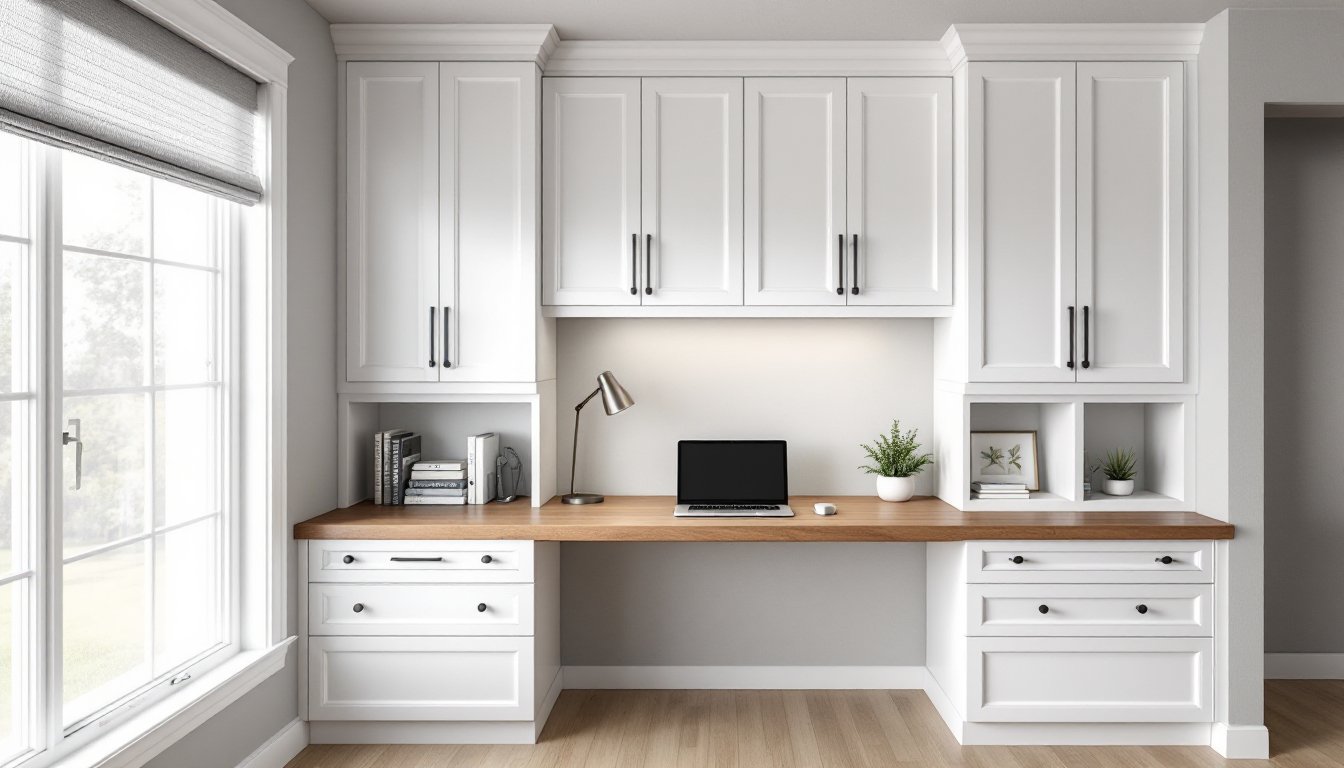
Upper cabinets keep supplies within reach without cluttering the desktop. Mount them 18 to 24 inches above the work surface to avoid head bumps and allow clearance for monitors. Standard wall cabinet depth is 12 inches: anything deeper encroaches on sightlines.
Drawer units under the desktop hold files, chargers, and tools. Use full-extension ball-bearing slides rated for at least 75 pounds, cheap side-mount slides bind and fail. Include one file drawer (12 inches deep internally) if paper still matters in your workflow.
Open shelving above or beside the desk works for books and décor but collects dust. If you go open, use 3/4-inch hardwood or plywood with spans no greater than 32 inches to prevent sagging. Adjustable shelf pins (drilled on 32mm spacing) offer flexibility as needs change.
Pegboard or slat walls behind the desk organize cables, headphones, and small tools. Paint pegboard to match the wall, then add office storage accessories like bins and hooks. It’s easier to reconfigure than drilling new holes every time you add a device.
Lighting and Electrical Considerations
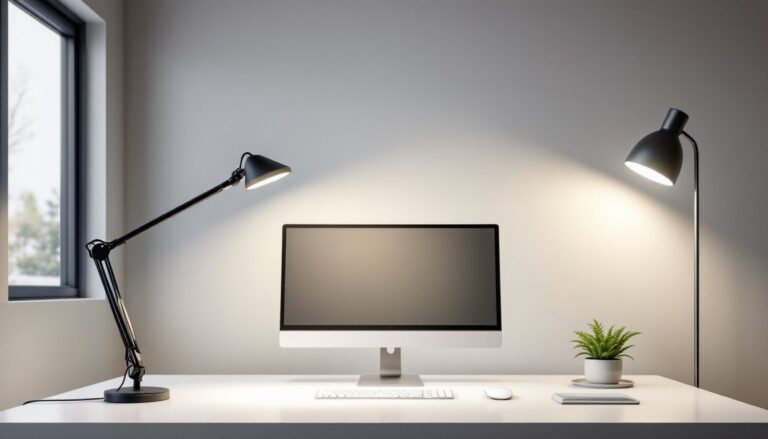
Natural light reduces eye strain but creates screen glare. Position desks perpendicular to windows, not facing or backing them, so daylight comes from the side. If that’s impossible, install adjustable blinds or sheers to diffuse direct sun.
Task lighting is essential. An LED desk lamp with adjustable color temperature (3000K to 5000K) lets users dial in warm light for evening work or cool light for detail tasks. Alternatively, mount an under-cabinet LED strip along the front edge of upper cabinets for even, shadow-free illumination.
Electrical outlets should be accessible without crawling under the desk. Install a 20-amp circuit with at least four outlets (two duplex receptacles) at desktop height. Surface-mounted power strips work but look messy: a pop-up outlet or desktop grommet with integrated USB ports keeps cables tidy.
Hardwiring considerations: Running new circuits requires an electrical permit in most jurisdictions and must comply with NEC (National Electrical Code) requirements. If you’re not comfortable working in a panel or fishing wire through walls, hire a licensed electrician. Incorrect wiring is a fire hazard and voids homeowner’s insurance.
Cable management prevents the nest of cords that tangles behind every desk. Drill 2-inch grommets in the desktop for monitor and peripheral cables. Use adhesive cable clips or a wire raceway along the underside of the desk to bundle power and data lines. Label cables at both ends with a label maker, future you will appreciate it during troubleshooting.
DIY vs. Professional Installation: What to Consider
DIY built-ins are achievable for intermediate woodworkers with a table saw or track saw, drill/driver, level, and stud finder. Expect to invest 20 to 30 hours for a simple desk and shelving unit. Use cabinet-grade plywood (birch or maple veneer) and iron-on edge banding for a clean finish. Pocket-hole joinery (with a Kreg Jig or similar) simplifies assembly without visible fasteners.
Paint-grade projects are more forgiving than stain-grade. MDF (medium-density fiberboard) accepts primer and paint beautifully and costs less than hardwood, but it’s heavy and generates fine dust, wear a respirator during cutting. Prime all edges to prevent moisture absorption and swelling.
When to call a pro: Complex installations involving load-bearing wall modifications, HVAC rerouting, or integrated lighting systems exceed most DIY skill sets. Licensed contractors carry liability insurance and pull permits, which protects homeowners if inspections reveal code violations. Structural changes, removing walls, adding headers, or altering floor joists, require an engineer’s stamp in many jurisdictions.
Carpentry rates vary, but expect $50 to $100 per hour for skilled finish carpenters. Custom millwork shops charge per linear foot or project: a mid-range built-in office with cabinets and countertop runs $2,000 to $5,000 installed, depending on materials and region. Get three quotes and ask for references with photos of completed work.
Budget-Friendly Ideas for Building Your Home Office
Stock cabinets from big-box stores cut costs dramatically. IKEA’s SEKTION line and Home Depot’s Hampton Bay cabinets install like built-ins when mounted wall-to-wall. Add a custom countertop from a local fabricator or build your own from butcher block panels (about $100 for a 6-foot length). Paint or stain cabinets to match your trim for a cohesive look.
Floating shelves made from 2×10 or 2×12 dimensional lumber provide mass and character at hardware-store prices. Rip them to width on a table saw, sand, stain, and mount with heavy-duty floating shelf brackets hidden inside the board. Each shelf costs $15 to $30 depending on wood species.
Closet organizer systems double as office storage. Wire or laminate ClosetMaid or Rubbermaid kits include adjustable shelves and hanging rods that adapt to files, books, and supplies. Install a solid-core door slab or butcher block across two organizer towers for an instant desk.
Reclaimed materials add character and savings. Architectural salvage yards stock old doors, mantels, and trim that can become desktop surfaces or shelving. Sand and seal reclaimed wood to remove splinters and old finishes, wear gloves and a dust mask, as older paint may contain lead.
Paint and accessories unify mismatched components. A coat of semi-gloss trim paint in a neutral color makes budget plywood look intentional. Add brass or matte black cabinet pulls ($3 to $8 each) for a polished finish. Simple upgrades like swapping generic hardware or adding a fresh paint color transform a utilitarian workspace into a design feature.
Finally, explore inspiration from sources like Houzz’s built-in desk gallery or design blogs such as Apartment Therapy for creative solutions in tight spaces. Real project photos reveal how others solved layout challenges and integrated storage without breaking budgets.